
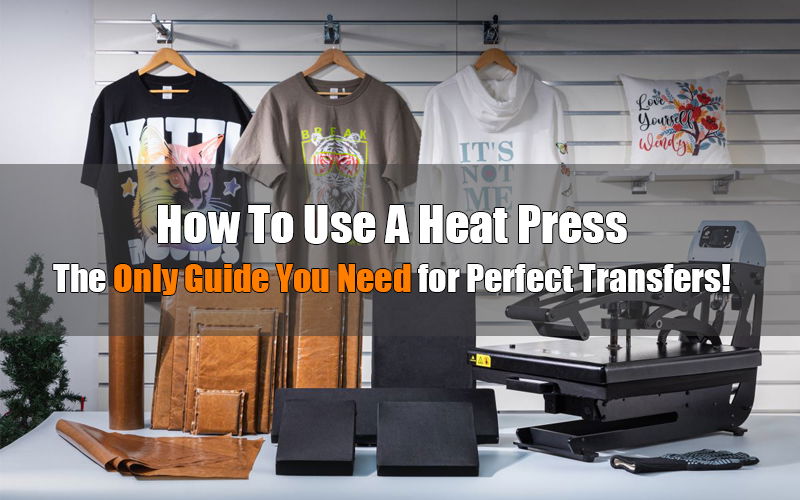
Using a heat press machine effectively is crucial for achieving professional-quality heat transfers, whether you’re working on apparel, promotional items, or custom designs. Many beginners and even seasoned operators often struggle with challenges such as selecting the right settings, designing effective transfers, managing fabric compatibility, and troubleshooting common issues like peeling or fading. This comprehensive guide on how to use a heat press machine will cover not only the operating procedures but also tips on design, troubleshooting techniques, and maintenance best practices. By understanding these key aspects, you can ensure consistent, high-quality results and enhance your overall productivity in every step of the heat transfer process.
When to Use a Heat Press Machine?
A heat press machine is specifically designed to apply heat and pressure to substrates for customization purposes. For businesses in the printing and customization industry, it is an essential tool, as many printing techniques rely on it to transfer designs onto various materials. Below are some of the most common scenarios where a heat press machine is indispensable:
Sublimation Printing
Sublimation printing uses heat to transfer dye into polyester fabrics or polymer-coated surfaces, resulting in vibrant, long-lasting designs. This technique is most commonly used for creating custom apparel, mugs, and promotional items. It’s ideal for businesses focusing on personalized merchandise and photo gifts, especially those catering to small to medium-sized custom printing shops.
Direct-to-Film (DTF) Transfers
DTF printing allows designs to be printed onto special films, then transferred to fabrics using a heat press. It’s known for its versatility, offering high-quality prints on both cotton and polyester. Popular among apparel businesses, DTF is best suited for custom clothing brands and small-scale print shops looking for flexibility in fabric choice and vibrant prints.
Heat Transfer Vinyl (HTV)
HTV involves cutting designs from vinyl sheets and applying them to garments with a heat press, creating bold, durable graphics. This technique is popular for custom t-shirts, bags, and home décor items. It’s best suited for DIY users and crafters, offering an easy and affordable way to personalize apparel and small projects without the need for extensive equipment.
Plastisol Heat Transfers
Plastisol heat transfers involve screen printing designs onto a transfer sheet and then applying them to garments using a heat press, resulting in a screen-printed finish. This technique is popular in the sportswear and promotional product industries. Best for screen-printing businesses and clothing brands that need high-volume, durable prints with a professional look.
Although heat press machines are widely recognized for their use in specific printing techniques, their applications extend well beyond these methods. Many DTG (direct-to-garment) business owners prefer utilizing the hovering function of swing-away heat press machines for pre-heating garments, enhancing ink adhesion and overall print quality. Another popular application of heat press machines is to attach iron-on patches to bags, garments, shoes, and various substrates for decorative purposes. This versatility makes heat press machines invaluable tools across a range of customization and crafting endeavors.
How to Set Up Your Heat Press: Temperature and Time Basics
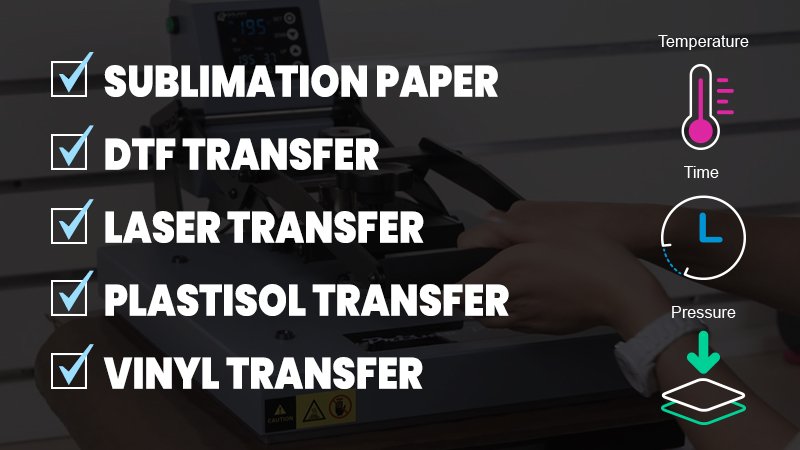
Regardless of the customization technique employed in daily order production, the three critical settings for any heat transfer process are temperature, pressure, and time.
What Are the Right Settings for Your Projects?
Fortunately, most heat press machine suppliers simplify the process of setting temperature and time, while pressure adjustments are typically found on industrial models. The main challenge lies in determining the correct settings for specific applications, as different techniques and materials often require unique configurations. To help users get started easier, we have compiled a comprehensive guide detailing heat press settings tailored to various temperatures and materials. If you cannot find the settings for your particular material or application, please leave a comment on the post.
How to Set Custom Presettings for Your Heat Press?
Since settings vary based on the techniques and materials used in your business, it can be tedious to remember and adjust them frequently. To streamline this process, many heat press machines offer presettings. For instance, Galaxy Press machines provide 10 presettings for various temperature and time combinations tailored to different applications and materials, which typically suffices for most businesses that focus on a select few materials and techniques. To learn how to access and customize these settings, please refer to the following video (time from 2:56 to 3:57):
How to Get the Perfect Pressure on Your Heat Press?
Standard heat press machines lack pressure readouts, making it challenging for users to achieve optimal pressure settings without specific skills. A common method to test pressure is the “paper test.” Place a sheet of copy paper between the platens, close the press, and gently pull on the paper. If it comes out with slight resistance, the pressure is correct; if it pulls out too easily, increase pressure; if it’s difficult to pull out, decrease pressure. For even pressure distribution, use four pieces of paper in each corner and adjust until all are equally resistant.
Always adjust settings based on the material being pressed and refer to the manufacturer’s instructions for specific recommendations. Generally, thicker materials, such as photo slate and glass cubes, may require higher pressure. It is advisable to conduct tests and document settings for various materials to enhance efficiency. The pressure adjustment process may vary by heat press model, typically involving a dedicated knob that can be rotated clockwise or counterclockwise.
How to Use a Heat Press Machine Step By Step?
How to Preparing Your Heat Transfer Artwork?
Before beginning your pressing and printing process, it’s essential to ensure that your artwork is properly prepared for optimal printing results. Here are some key tips to follow when creating design files to achieve the best possible outcome:
Mirror Image If Necessary: Many heat transfer processes, especially those involving using transfer paper or film, require a mirrored version of the artwork (For some transparent blanks like glass photo panel, design mirroring would be unnecessary). This ensures that the design appears correctly when transferred onto the garment. Use graphic design software to flip your artwork horizontally before printing.

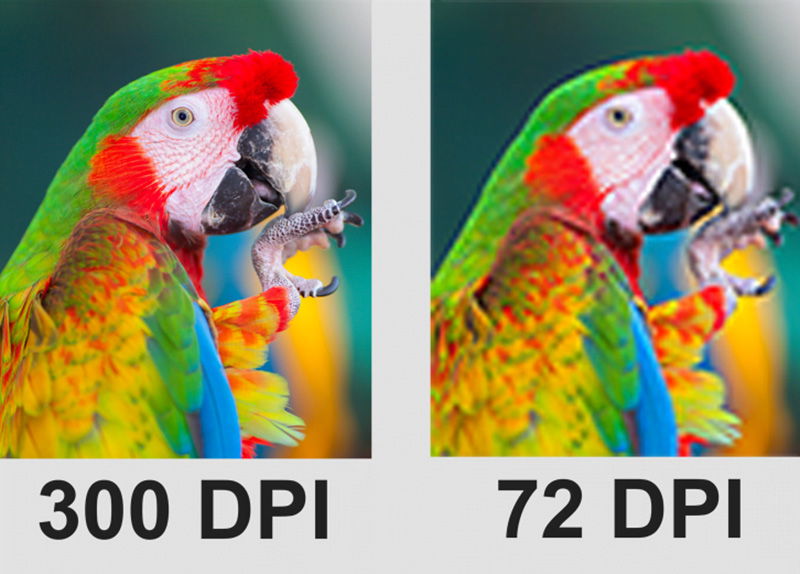
Ensure High Resolution: High-resolution artwork is crucial for achieving sharp, clear prints. Low-resolution images can result in pixelation and blurriness, compromising the quality of your final product. Aim for a resolution of at least 300 DPI (dots per inch) for print designs. When creating or resizing images, ensure that the dimensions are suitable for the final print size to maintain clarity.
Choose The Right File Types: The file type you select for DTF printing greatly impacts the quality and vibrancy of the final product. There are two main categories: vector and raster files. Vector files (AI, EPS, PDF) utilize mathematical points, allowing for infinite scaling without losing quality, making them ideal for designs with solid colors and sharp lines. In contrast, raster files (JPEG, PNG, TIFF) consist of pixels and are better suited for detailed images and photographs, but their quality relies on resolution, which can diminish when scaled.
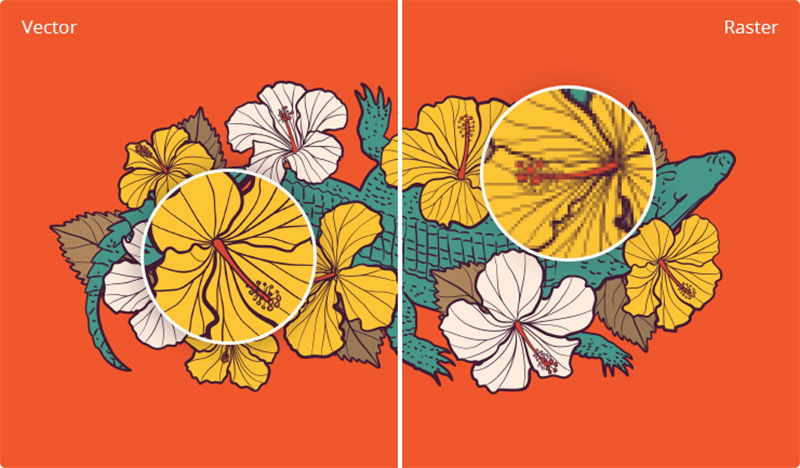
To achieve optimal results, use vector files whenever possible, especially for solid colors and text. If you choose raster files, select high-resolution formats like PNG or TIFF to maintain detail and vibrancy. Avoid GIFs, as they are limited to 256 colors and do not provide the quality needed for high-quality DTF prints.
Choose the Right Color Mode: The color mode you use affects how colors are displayed and printed. RGB (Red, Green, Blue) is suitable for digital displays, while CMYK (Cyan, Magenta, Yellow, Black) is best for printing processes. However, DO NOT CONVERT RGB TO CMYK DIRECTLY as this could lead to less vibrant prints. To ensure optimal color reproduction for your heat press designs, start by working in RGB mode, which offers a wider color gamut for more vibrant options. Always preview your design in CMYK mode to see how colors will shift when printed, helping you prepare for the final output. Save your DTF files in sRGB format, allowing professional-grade RIP software to handle the conversion to CMYK for the best results. If your design is in vector format and started in CMYK, submit it as is to maintain color integrity; for raster designs, convert to sRGB before adjusting levels for optimal quality.

Convert Text to Curves/Outlines: Converting text from live type to outlines or curves is critical for ensuring that your artwork is cut or printed as intended, as this transformation converts the text into a graphic format that maintains consistent appearance across various devices. To avoid crosscuts in overlapping areas, which is particularly important in vinyl cutting, it is advisable to use the unite or weld tools to merge these elements into a single cohesive piece of artwork, thereby achieving a clean and professional finish.
Avoid Soft Edges and Transparency in DTF Printing: To ensure optimal print quality for direct-to-film (DTF) transfers, it is essential to avoid soft edges and transparent pixels in your artwork. These elements can hinder effective transfer and result in poor wash durability. Additionally, refrain from using drop shadows or faded edges, as they may compromise the clarity and integrity of the final print. By maintaining solid shapes and colors, you can achieve a cleaner and more professional outcome.
Designing for Your Blanks: Another important tip is to create designs tailored to your specific sublimation blanks, as some items may require special attention to design details. Factors such as the material, texture, and shape of the blanks can significantly influence how the final design will appear once printed. By considering these aspects, you can enhance the overall quality and impact of your transfers. For further insights, be sure to check out our YouTube playlist, where our designer shares valuable tips and techniques for working with our sublimation blanks, helping you achieve the best results in your projects.
How to Prepare the Transfer?
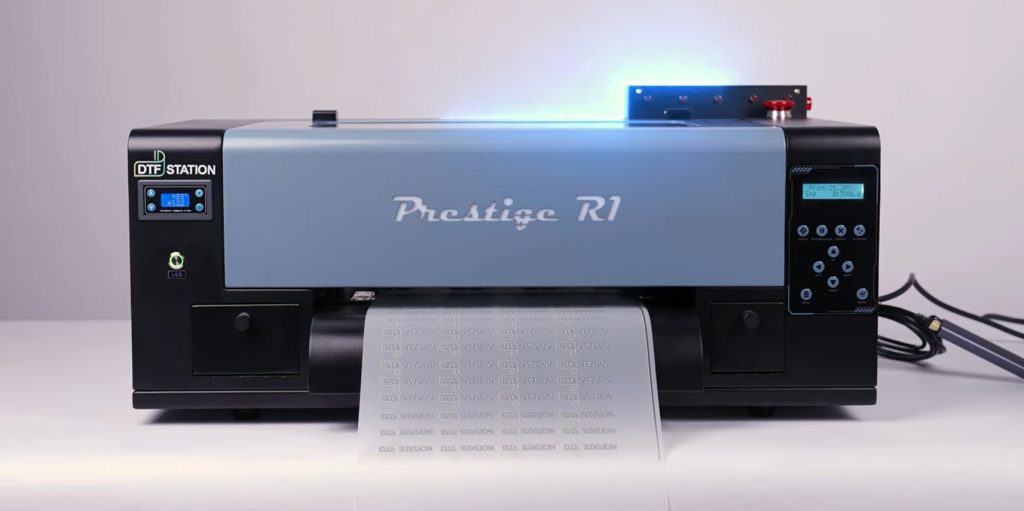
When preparing your transfer, users have the option to either purchase ready-to-press transfers from online retailers or create their own. The process for each option can vary significantly; ready-to-press transfers offer convenience, making them an easier choice for personal gifts. However, if you are printing for your business, investing in reliable equipment to print transfer paper or film can be a more cost-effective and practical choice in the long run.
How to Prepare the Substrate?
Depending on the printing technique and substrates you choose, the preparation process can vary. Here are a few key steps to help get your substrates ready:
- Cleaning: Pre-wash your substrates to remove any dirt, oils, or sizing agents that may interfere with the transfer process.
- Coating: For sublimation, substrates usually require a polymer coating. You can either source pre-coated blanks from third parties or apply the coating yourself. For businesses, buying ready-to-press blanks from reliable suppliers is recommended for efficiency and cost-effectiveness.
- Pre-heating: In DTF printing, preheating garments with a heat press is recommended to remove any wrinkles or moisture, ensuring optimal printing results.
How to Position Your Design?
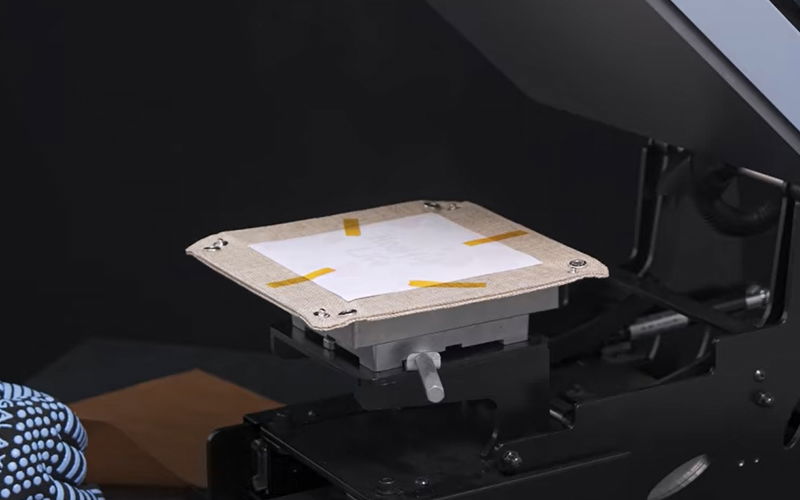
Once your transfer and substrate are prepared, secure the design to the target location using heat-resistant tape to prevent shifting during application. For garment decoration, careful planning is essential; design effect, sizing, and placement are critical factors. For more details, refer to the Transfer Placement T-shirt Design Size Chart Guide.

How to Peel Off Carrier Sheet/Cover Sheet for Heat Transfer?
Peeling off the carrier or cover sheet may seem straightforward, but following a few additional tips can help you avoid costly mistakes and material waste. Here are some recommendations to enhance efficiency in your business:
- Follow Manufacturer Guidelines: Depending on the type of film, you may need to wait for the transfer to cool down or peel it immediately. Adhering to the supplier’s instructions is essential for achieving optimal results.
- Exercise Patience: Peel the carrier or cover sheet slowly and carefully. Rushing this process can lead to print failure and unnecessary material waste.
- Peel, Check, and Re-press: As you peel, monitor the adhesion of the transfer to the substrate. If the transfer does not bond properly with the fabric, a second press may be necessary to ensure proper adherence.
How to Troubleshoot Common Issues for Heat Transfer?
Transfer Adhesion Issues
If the design or transfer paper doesn’t adhere properly to the fabric, it can result in peeling or fading of the design after washing. Inadequate pressure, temperature or pressing time could be the main cause. To address this problem, use a Teflon sheet or silicone pad to ensure even heat and pressure distribution and then caliberate the settings. First, try increasing the pressure. If that does not work, then try increasing the press time by just a few seconds. If you still are having problems, then increase the heat by 5 degrees. Another possible reason might be incompatible fabrics, such as nylon, rayon, or stretchy materials, may not properly hold heat transfer vinyl (HTV), while cotton, polyester, and poly-cotton blends yield better results. Additionally, moisture in the fabric can hinder HTV bonding. To resolve these issues, ensure you’re using compatible fabrics and pre-press the garment to eliminate any moisture, promoting a stronger bond with the HTV.
Sticking or Scorching
Sticking or scorching of the fabric is a common problem when using a t-shirt press machine. This can happen if the temperature is too high or if the pressing time is too long. To resolve this issue, try decreasing the pressure first, and if that does not help, then decrease the heat as well unitl get perfect transfer release. Using a Teflon sheet or silicone pad between the fabric and the platen can also help prevent sticking and protect the fabric from scorching.
Faded or Spotty Transfers
Faded or spotty heat transfers can compromise the quality of printed designs, resulting in a patchy appearance. This issue may arise from several causes, including uneven heat distribution, improper temperature settings, and moisture in the substrate or transfer paper. To address these problems, use temperature strips or a thermal gun to check for heat inconsistencies across the press surface, and pre-press both the substrate and transfer paper to eliminate moisture, ensuring better ink adhesion. Additionally, regularly calibrate your heat press for accurate temperature and pressure settings, and always adhere to the manufacturer’s instructions for optimal results.
Design Cracking or Peeling
Design cracking or peeling after application or washing is a common issue in heat transfer printing that can detract from the appearance of printed designs and cause frustration. This problem may arise from several factors, including the use of dye-based inks instead of more durable pigment-based inks, insufficient pressing time or temperature, improper washing conditions, and incompatible fabrics like nylon or stretchy materials. To address these issues, invest in high-quality pigment-based inks, follow the manufacturer’s recommended pressing parameters, and provide customers with proper washing instructions—such as using cold water and mild detergents. Additionally, select compatible fabrics, pre-press the garment to remove moisture, and use a cover sheet during pressing to protect the design and ensure even pressure distribution.
Transfer Paper Not Peeling Easily
A common issue with heat transfer paper is difficulty peeling it off smoothly after pressing, which can result in incomplete or ruined transfers. This problem may stem from insufficient heat or pressing time, incorrect peeling techniques, excessive pressure, or incompatible fabrics. To resolve this, check the manufacturer’s recommended temperature and pressing duration to ensure proper adhesion. Experiment with different peeling techniques—such as peeling hot, warm, or cold—to find the best approach for your specific materials. Adjust the pressing pressure if the paper sticks too much, and consider using a silicone sheet or parchment paper during pressing to facilitate easier peeling. Finally, always test on a scrap piece of fabric to determine the optimal settings and techniques before applying to your final project.
Color Migration
Color migration occurs when dyes from dark or sublimated garments bleed into the transfer material, leading to unwanted discoloration. This issue can be caused by low-quality garments with unstable synthetic dyes, insufficient dye blockers in the transfer materials, or excessive heat and pressure during the pressing process. To mitigate color migration, invest in high-quality anti-sublimation heat transfer vinyl (HTV) with a dye-blocking layer and choose garments made from natural fibers or those with stable dyes. Perform test presses on scrap fabric to identify potential issues and adjust settings accordingly. Additionally, consider using a dye blocker or underlayer as a barrier, and experiment with lower temperatures and shorter pressing times to minimize the risk of dye migration.
Stains or Bubbles on Transfers
Visible stains or bubbles on heat transfers can ruin the look of your design. Common causes include residual moisture in the fabric, dust or lint particles, insufficient pressure during transfer, and overheating. To prevent these issues, pre-press the garment to remove moisture, use a lint roller to eliminate dust and debris, and ensure adequate pressure is applied according to the recommended settings. Follow temperature guidelines carefully to avoid overheating, and consider using a Teflon sheet or heat-resistant paper between the heat press and the transfer to prevent direct contact and potential staining.
Banding and other Visual Imperfections
Banding and other visual imperfections in sublimation designs can result in unwanted lines on the substrate, often caused by low-quality ink or clogged printer heads. To troubleshoot this issue, ensure timely maintenance of your sublimation printer to keep it clean. Always use high-quality sublimation paper that is compatible with your printer, and optimize your print settings for each specific job to achieve the best results.
How to Enhance Printing Experience with Essential Accessories?
Teflon Pillow Case
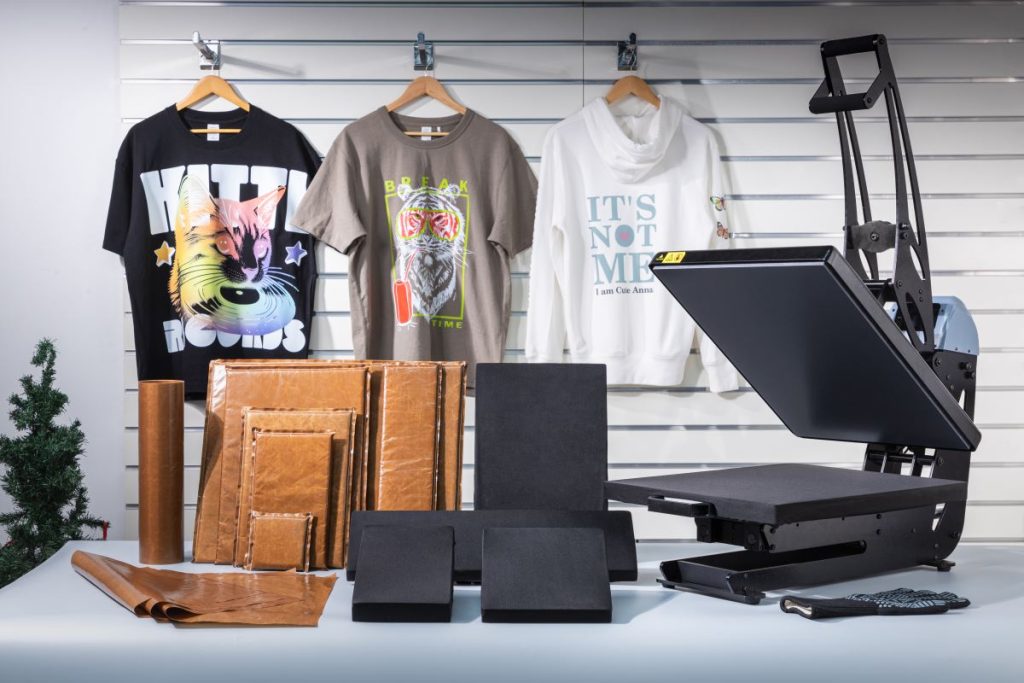
The Teflon pillow case, available in various sizes, is an essential accessory for any heat press setup, designed to accommodate uneven objects while ensuring even pressure distribution and substrate protection. These pillows are ideal for pressing heat transfers, DTF transfers, vinyl projects, and screen prints on garments with seams, zippers, and buttons, providing a smooth surface that results in vibrant, flawless transfers. They eliminate indentations by lifting the print area, allowing for consistent pressure across bulky fabrics. Made from heat-resistant Teflon and fire-resistant foam, the Teflon pillows are reusable and durable, safeguarding your finished products and enhancing safety during operation. Easy to use, simply place the appropriate size pillow between the layers of fabric in your heat press, and enjoy the versatility they bring to various crafting projects while protecting your workbench from burns.
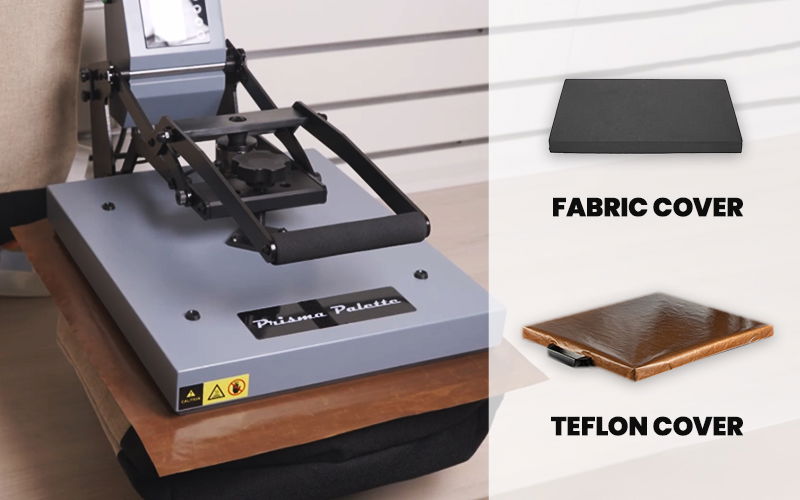
Teflon/Fabric Heat Press Cover
The Teflon/fabric heat press cover is another important accessory for any heat press setup, offering superior protection and efficiency by preventing ink and adhesive buildup on platens, which ensures clean and consistent transfers. Made from heat-resistant materials, this cover not only prolongs the life of your equipment but also streamlines your workflow for professional-grade results. Choose between fabric, ideal for garment decoration, and Teflon, which is recommended for rigid substrates like photo slates and glass. Its dual protection safeguards bottom platens from residues, while the premium materials provide excellent heat resistance and long-lasting durability. Additionally, the non-stick surface simplifies cleanup, maintaining a tidy workspace and enhancing overall efficiency.
Teflon Sheet
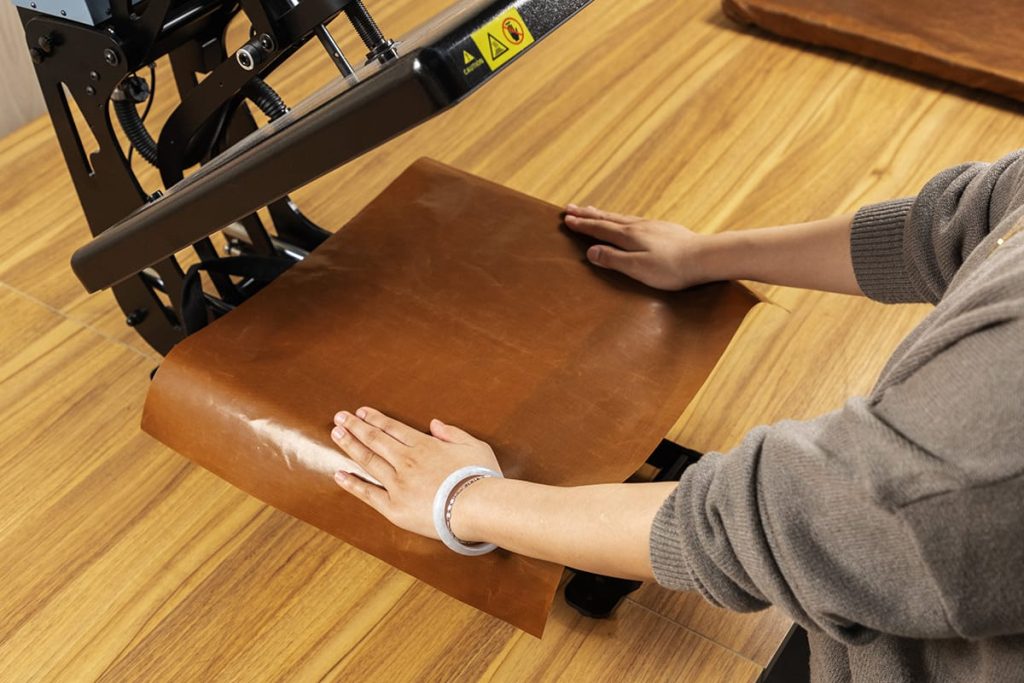
Teflon sheets, available in sizes like 15″x15″, 16″x20″, 11″x15″, and 9″x12″, are valuable tools for anyone involved in crafting, particularly sublimation blanks resellers. These non-stick sheets provide heat protection and ensure even heat distribution, which is essential for achieving flawless transfers. They are waterproof and washable, making it easy to maintain a clean workspace. Made from durable, tear-resistant material, these sheets can withstand high temperatures up to 600°F, helping to protect your work surface and ensure safe operation. They can be cut to custom sizes to meet specific crafting needs. Additionally, Teflon sheets are also available in rolls (1x50M), offering further options for those with larger projects.
Interchangeable Lower Platen
An interchangeable lower platen for heat pressing is a valuable addition to any heat press setup, providing flexibility and convenience for various projects. This feature allows users to easily switch out platens of different sizes and shapes, accommodating a wide range of substrates, from small items like hats and sleeves to larger garments. By using the appropriate platen for each specific project, users can achieve better pressure distribution and ensure that the heat is applied evenly across the entire surface, resulting in higher-quality transfers. Additionally, interchangeable platens can enhance efficiency by reducing setup time, allowing for quicker transitions between different types of jobs. This versatility not only improves the overall quality of the finished products but also helps streamline the crafting process, making it an essential tool for both professional and DIY heat press users. Following are all available platen sizes and compatible heat press machines from the Galaxy Press product line:
| Platen | Size | Item No. | Applicable Heat Press | Applicable Blanks |
|---|---|---|---|---|
 | 4″*4″ | J.02.07.0006 |  |  |
 | Dia 4″ | J.02.07.0005 | |  |
 | 6″*6″ | J.02.07.0004 | |  |
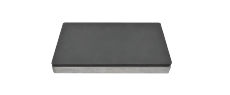 | 6″*10″ | J.02.07.0007 | |  |
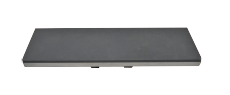 | 6″*20″ | J.02.07.0008 |  |  |
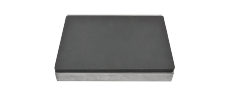 | 8″*10″ | J.02.07.0009 | | 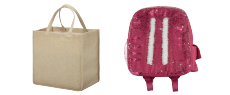 |
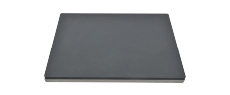 | 11″*15″ | J.02.07.0011 | |  |
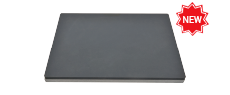 | 12″*16.5″ Perfect fit with A3 DTF printer | J.02.07.0066 | | 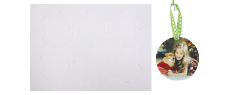 |
 | 15″*15″ | J.02.07.0012 | |  |
 | 16″*20″ | J.02.07.0013 | |  |
Heat-resistant Tape
Heat-resistant tape securely holds transfers and materials in place during the application process, ensuring precise alignment and preventing shifting. This tape can withstand high temperatures without melting or leaving residue, making it ideal for a variety of heat transfer projects. Its ability to adhere firmly to fabrics, papers, and other substrates enhances the quality of the final product by ensuring that designs stay intact throughout the pressing process. Additionally, using heat-resistant tape can help achieve clean edges and prevent ghosting, ultimately contributing to a professional finish. Whether you’re working with vinyl, sublimation, or other heat transfers, this tape is a reliable tool that enhances efficiency and accuracy in your crafting projects.
Heat Resistant Gloves
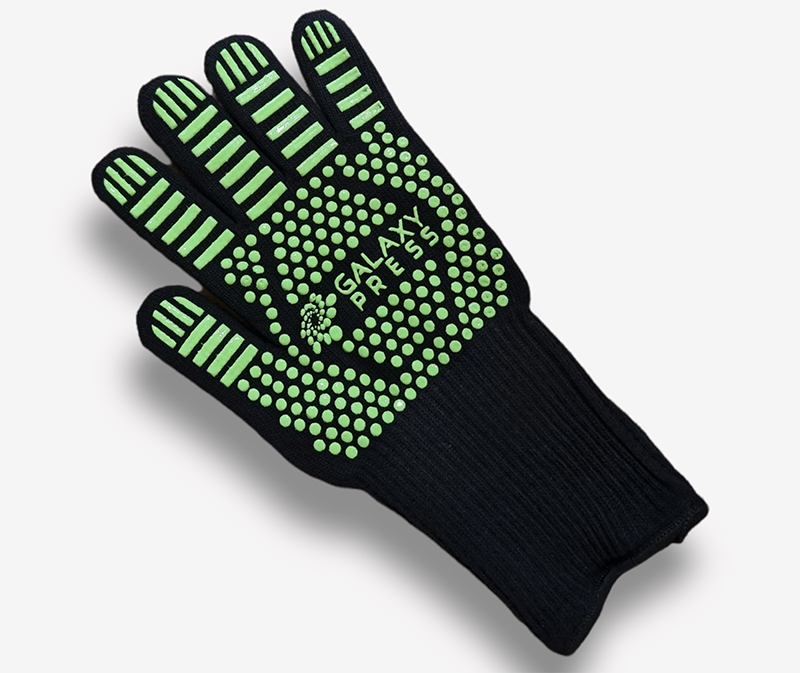
Heat-resistant gloves are a crucial safety accessory for anyone involved in heat pressing, providing essential protection against burns and injuries from hot surfaces and equipment. These gloves are designed to withstand high temperatures, allowing users to handle heated items with confidence and reducing the risk of accidents during the pressing process. Additionally, their versatility means they can be used for various tasks beyond heat pressing, such as baking or handling hot tools. Investing in high-quality heat-resistant gloves enhances safety, promotes efficient workflow, and ultimately contributes to a more successful and enjoyable crafting experience.
How to Clean Heat Press Machine?
Cleaning your heat press machine is vital for maintaining its performance and ensuring high-quality transfers. Many operators face challenges like ink residue, adhesive buildup, and other contaminants that can lead to poor application results and damage to the machine. By following these cleaning tips, you can prevent these issues, extend the lifespan of your heat press, and maintain consistent transfer quality.
Act Quickly: If you accidentally press a heat transfer upside-down, it’s crucial to address the ink on the top platen right away. Allowing the ink to remain exposed to high heat can cause it to cook onto the surface, making it increasingly difficult to remove. The sooner you act, the easier the cleanup will be.
Safety First: Turn down the heat press! Before cleaning, always turn off your heat press and allow it to cool down slightly. While it doesn’t need to be completely cold, a warm platen can help keep ink or adhesive pliable and easier to wipe away. Remember to wear heat-proof hand protection when cleaning while it’s still warm to avoid burns.
Be Gentle: Use a soft cloth, like an old t-shirt, along with a non-abrasive cleaner to wipe down the top platen. Avoid abrasive pads or harsh chemicals, especially on machines like Hotronix® that have a non-stick coating. Scratches can lead to pressure and temperature issues, affecting transfer quality. If you encounter stubborn ink, use a gentle cleanser like a mechanics non-abrasive hand cleaner or mild soap and water. Always wipe until no ink residue remains.
Prevent a Mess Before It Starts: Prevention is key to keeping your heat press clean. If necessary, use a proper paper cover sheet and avoid thick, non-stick covers that can hinder heat transfer. Additionally, always follow the temperature instructions that come with your transfers to prevent mishaps. Reducing distractions during the heat press operation can also minimize mistakes, such as pressing transfers upside down.
By incorporating these cleaning tips into your routine, you can ensure your heat press remains in excellent condition, providing you with the best results for all your heat transfer projects. What cleaning strategies have you found effective for your heat press?
How to Care & Maintain the Heat Press Machines?
Maintaining a heat press machine is essential for achieving consistent, high-quality transfers and prolonging the equipment’s lifespan. Many users struggle with common issues such as uneven heating, sticking transfers, or mechanical failures, often stemming from neglecting routine care. This guide provides practical maintenance tips that address these challenges, helping you ensure optimal performance and minimize costly downtime, ultimately enhancing your overall productivity and satisfaction with your heat press.
Dust Management
Keep Your Workspace Clean. A clean, dust-free working area is crucial for the longevity of your heat press. Dust can accumulate on electrical components, leading to malfunctions and overheating. Regularly use an air duster to gently blow away dust from these parts, especially around the control panel and heating elements.
Lubrication
Regular Lubrication of Wear Points. To ensure smooth operation, lubricate all wear points, such as pistons and rods, with high-temperature lithium grease. Apply a small amount; if there’s excess grease, wipe it off. Neglecting this maintenance can lead to friction and accelerated wear, so aim to lubricate your machine at least once a year, or more frequently if used heavily.
Upper Platen Care
Maintain a Clean Platen. A clean upper platen ensures optimal performance. Use a damp, soft cloth with appropriate cleaners like iron cleaner, alcohol, or mineral spirits to wipe it down. Always power off the machine before cleaning. Avoid rough scrubbing pads, as they can damage the Teflon coating, which is essential for even heat distribution and preventing sticking.
Cord Safety
Use the Original Power Cord. Always use the power cord that comes with your heat press. While other cords may fit, they might not support the necessary voltage, posing fire hazards. Additionally, keep cords away from hot surfaces to prevent melting or short-circuiting.
Protecting the Lower Platen
Utilize Teflon Accessories. Protect the silicone pad on the lower platen with Teflon sheets, covers, or pillows. Teflon sheets prevent garments from sticking, covers protect the rubber pad, and pillows help distribute pressure evenly over irregular surfaces like buttons or collars. Replace Teflon accessories when they show signs of wear, such as rips or cracks.
Temperature Testing
Check Heating Accuracy. Regularly test the temperature of the heating platen using a machine test kit. Set the desired temperature and verify that your machine accurately reaches and maintains it. Consistent temperature is critical for successful heat transfer.
Read the Manual
Consult the User Manual. Your heat press manual contains vital information about proper usage and care. It may also include model-specific maintenance procedures and troubleshooting tips, which can help extend the life of your machine.
Replace Worn Parts as Needed
Use Manufacturer-Recommended Components. When you notice worn or damaged parts, it’s crucial to replace them with components recommended by the manufacturer. Using the correct parts ensures compatibility and maintains the integrity of your heat press, helping to prevent further issues and prolonging the machine’s lifespan. Regularly inspect your equipment for signs of wear and address replacements promptly to keep your heat press operating at its best.
Conclusion
In conclusion, mastering how to use heat press machine is essential for anyone looking to produce high-quality heat transfers with consistency and ease. By understanding when to use the machine, how to set the correct temperature and pressure, and the importance of maintenance, you can significantly improve your printing outcomes. Troubleshooting common issues and utilizing the right accessories further enhance your experience, ensuring that every project turns out just as you envisioned. As you embark on your heat pressing journey, don’t hesitate to refer back to this guide for valuable tips and techniques. If you found this guide helpful, please share it with others and leave your comments below to help even more people succeed in their heat transfer endeavors!







Comment(01)
I don’t know how to get the proper settings a temp and pressure for my tumbler press, I keep burning my cups